2. The circular display
The display is a disc. A spinning bar of LEDs sweeps a full circle, and the renderer is asked for one column of 54 LEDs at each of 256 angles.
X is an angle
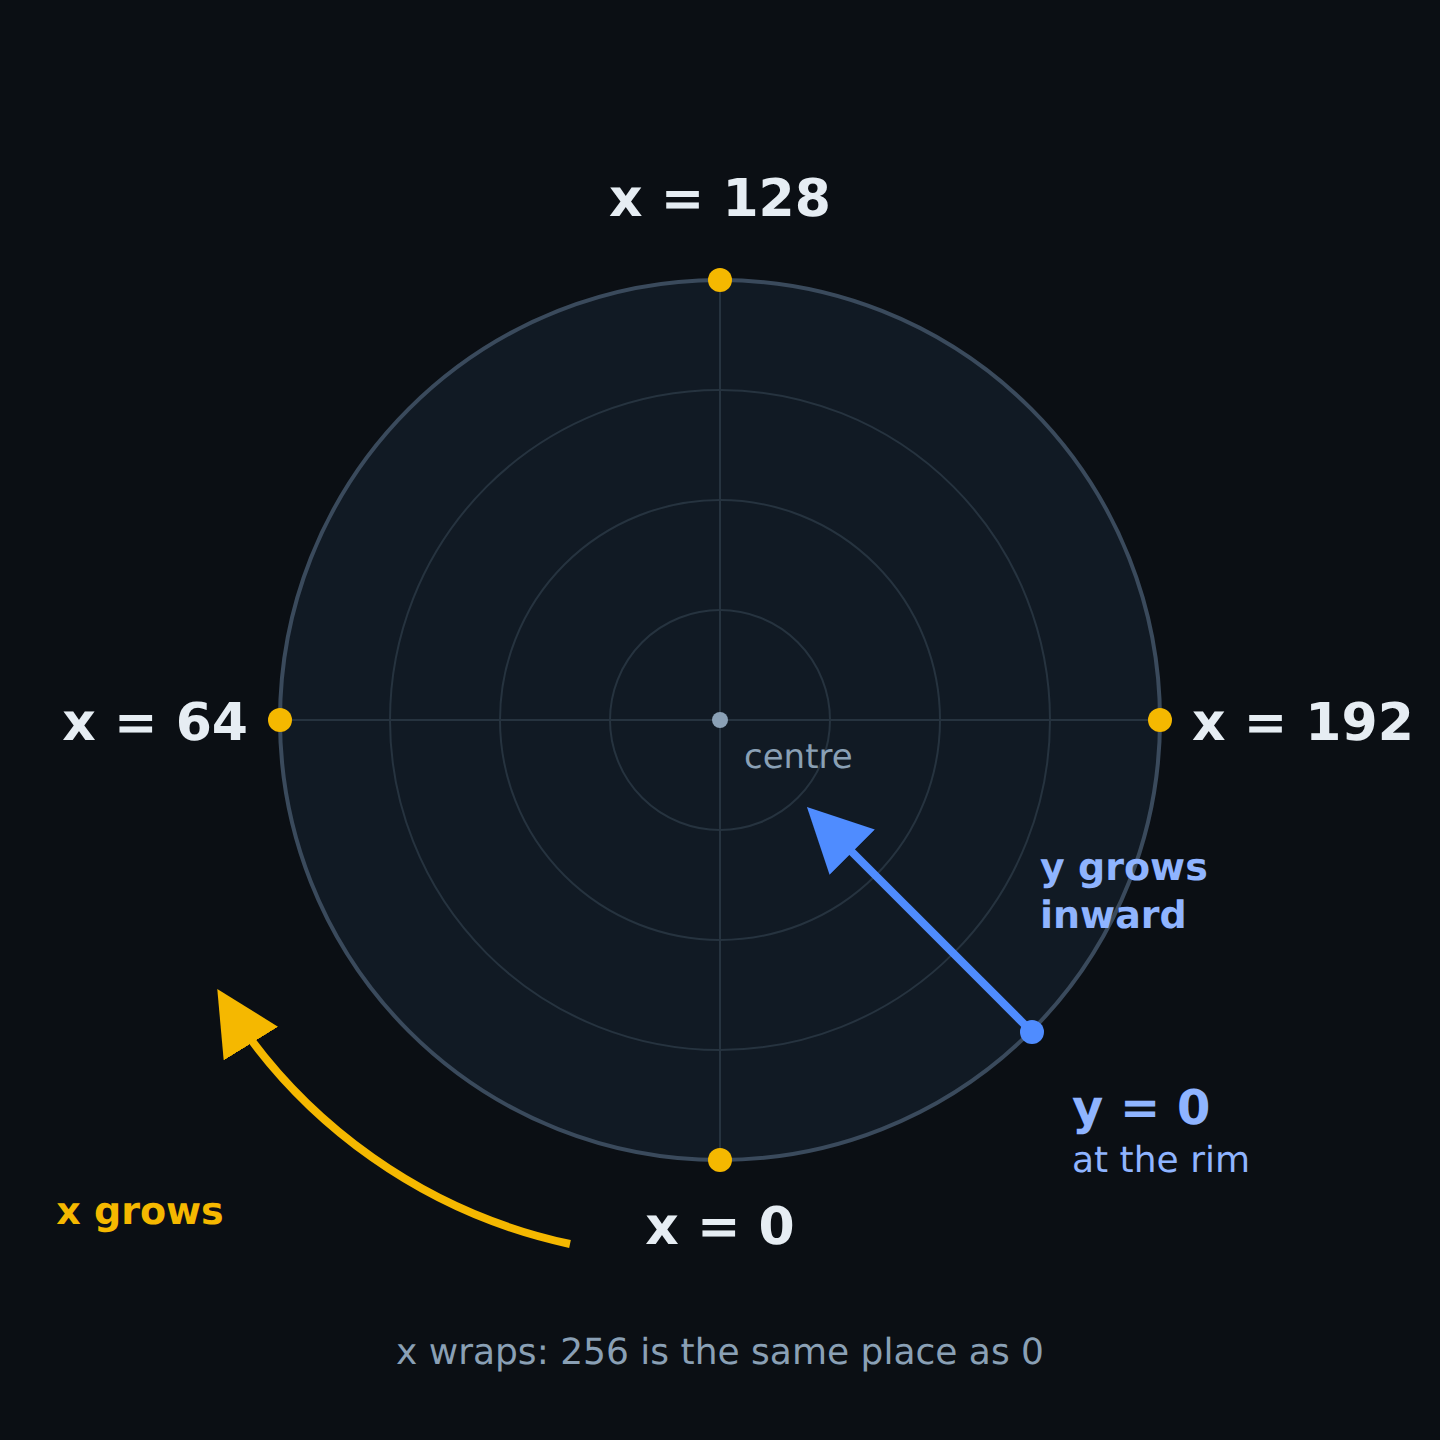
The two axes. X is an angle around the disc; Y is the distance in from the rim.
X runs 0 at the bottom, 64 at the left, 128 at the top, 192 at the right, and
wraps at vs2.display.width (256). A sprite at x=254 that is 8 columns wide
simply straddles the seam, and collisions handle that too. Four ships at
x = 0, 64, 128, 192, all at y = 0, in the emulator:
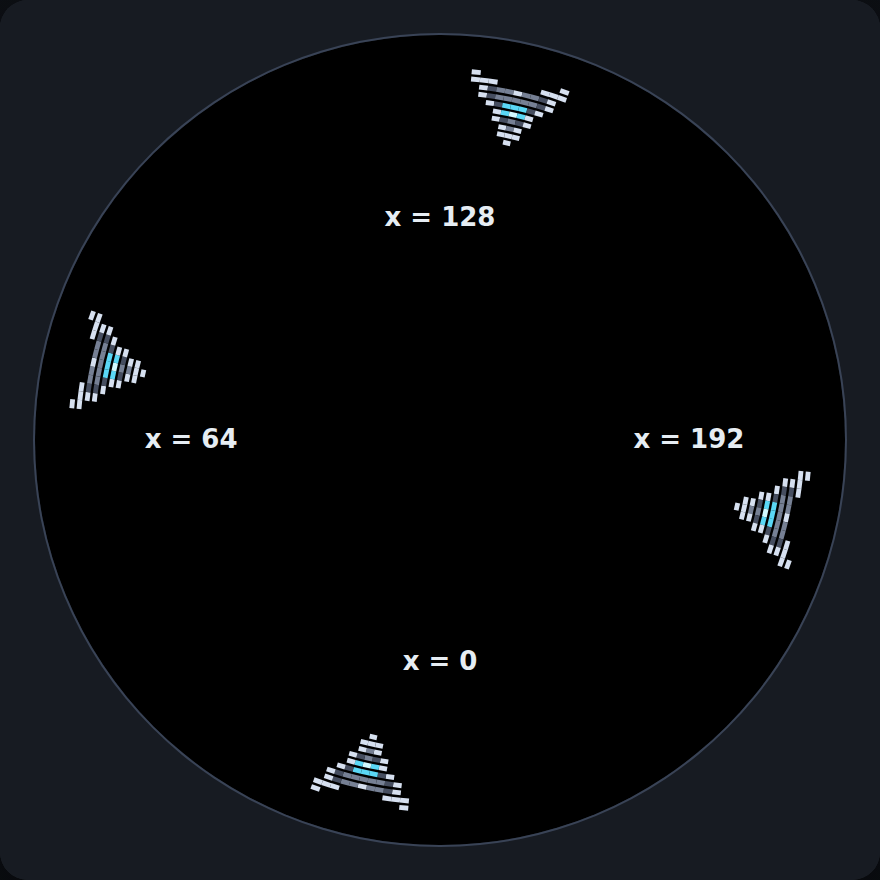
Four sprites at x = 0, 64, 128 and 192, all at y = 0.
Y is a distance inward from the rim
y = 0 is the outer rim, and Y grows as you move toward the centre. That is the opposite of the screen convention, and it is the thing most likely to trip you up.
What Y means — and how far it goes — depends on the layer’s projection, which you choose when you create the layer. A layer’s projection is not something a sprite can change.
Projection |
Y |
|---|---|
Depth, running 0 to 255. |
|
A direct LED index, no perspective. |
|
One centred image, for planets, backdrops and cloud cover. It uses the same curve as
|
def build(self):
    self.world  = self.layer("world",  projection=vs2.TUNNEL)
    self.clouds = self.layer("clouds", projection=vs2.FULLSCREEN)
    self.hud    = self.layer("hud",    projection=vs2.HUD)
Here is the same ship at several Y values on a TUNNEL layer (top) and a HUD
layer (bottom). Tunnel objects shrink as Y grows. HUD objects keep their height in
LEDs, though they look narrower near the centre because the same angle covers
less distance there:
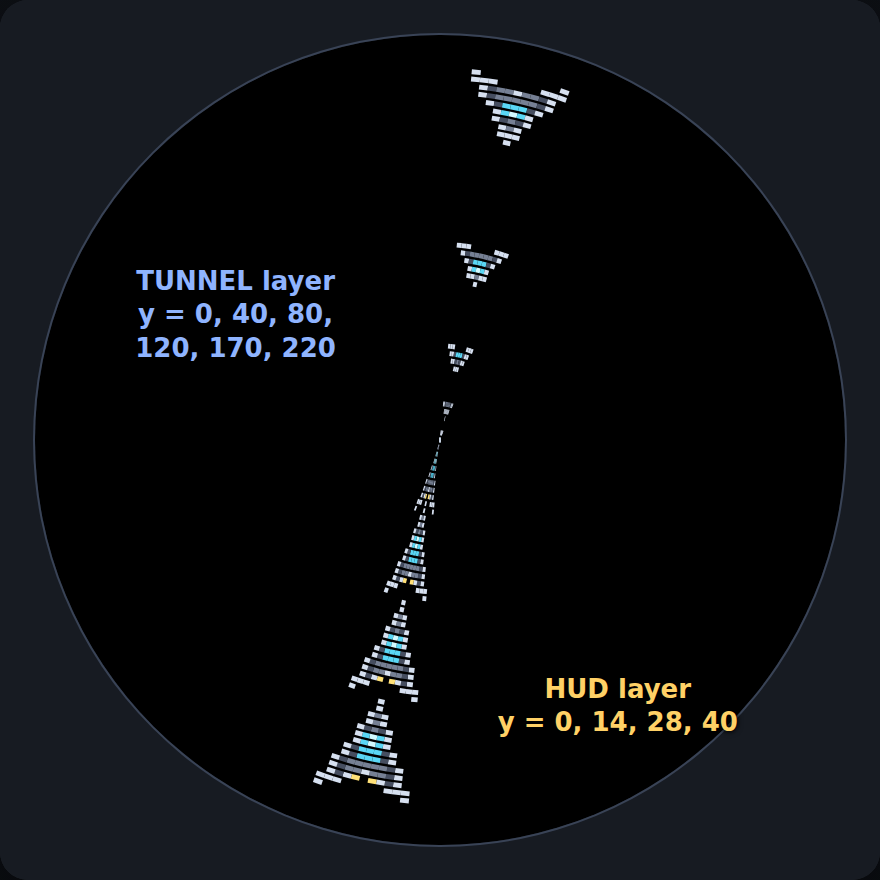
The same sprite on a TUNNEL layer at y = 0, 40, 80, 120, 170, 220 and on a HUD layer at y = 0, 14, 28, 40.
On a tunnel, an object at the player’s end of the world sits at y = 0. Things
coming toward the player count down in Y, and things moving away count up:
self.player.y = 0                   # at the rim, where the player lives
enemy.y -= 1                        # coming up the tunnel toward the player
if enemy.y < -20:
    self.enemies.despawn(enemy)     # it has gone past: retire it
Warning
vs2.display.height (54) is the LED count. It is the Y range for a HUD
layer, but a TUNNEL layer’s Y runs to 255. Do not use it as a general “off
the screen” test — pick a depth threshold that suits your game.
Both axes accept fractional values (ship.x += 0.25 moves a quarter of a
column). An X outside 0 to 255 wraps around the disc; a Y outside the layer’s
range clips rather than crashing.
Read the geometry, don’t hard-code it
x = (x + 1) % vs2.display.width      # wrap the angle

hud_label.y = 1                      # near the rim, where text is legible
vs2.display.width and vs2.display.height come from the
paired Python and C geometry definitions, maintained together in the SDK. Writing % 256 works today but silently breaks on any future display.
Draw order
Two rules, and they compose:
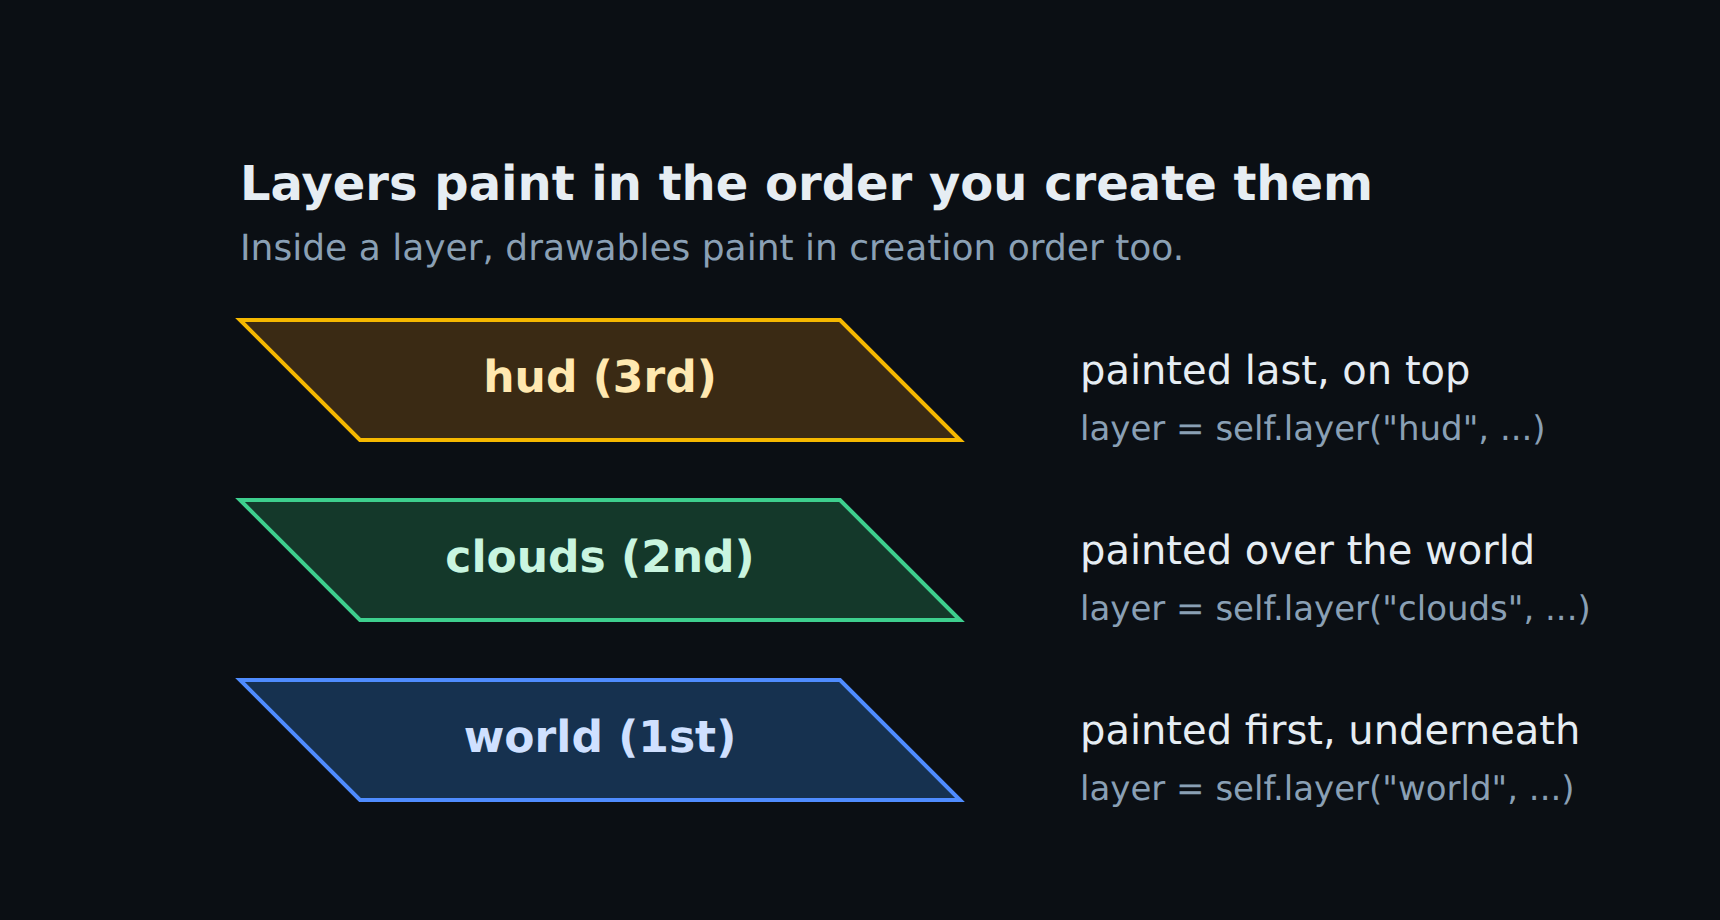
Layers paint in the order they are created.
Layers paint in creation order, bottom to top. In the example above,
worldis painted first andhudlast, so the world is at the bottom, the clouds drift over it, and the HUD is on top of everything.Within a layer, drawables paint in creation order, each over the ones before it — sprites, tilemaps and labels alike.
ground = world.tilemap("ground.png", columns=8, rows=17)
player = world.sprite("ship.png")
clouds = world.tilemap("clouds.png", columns=8, rows=4)
That paints ground, then the player, then clouds over both. There is no “all tilemaps, then all sprites” pass to work around.
Tip
Draw order follows the layer, not the order you happened to call the factories in. Creating a HUD label before a world sprite still leaves the label on top, because the HUD layer was created second.
For example, a world layer with a ship and some enemies, a FULLSCREEN layer
of clouds drawn over it, and a hud layer with a score look like this:
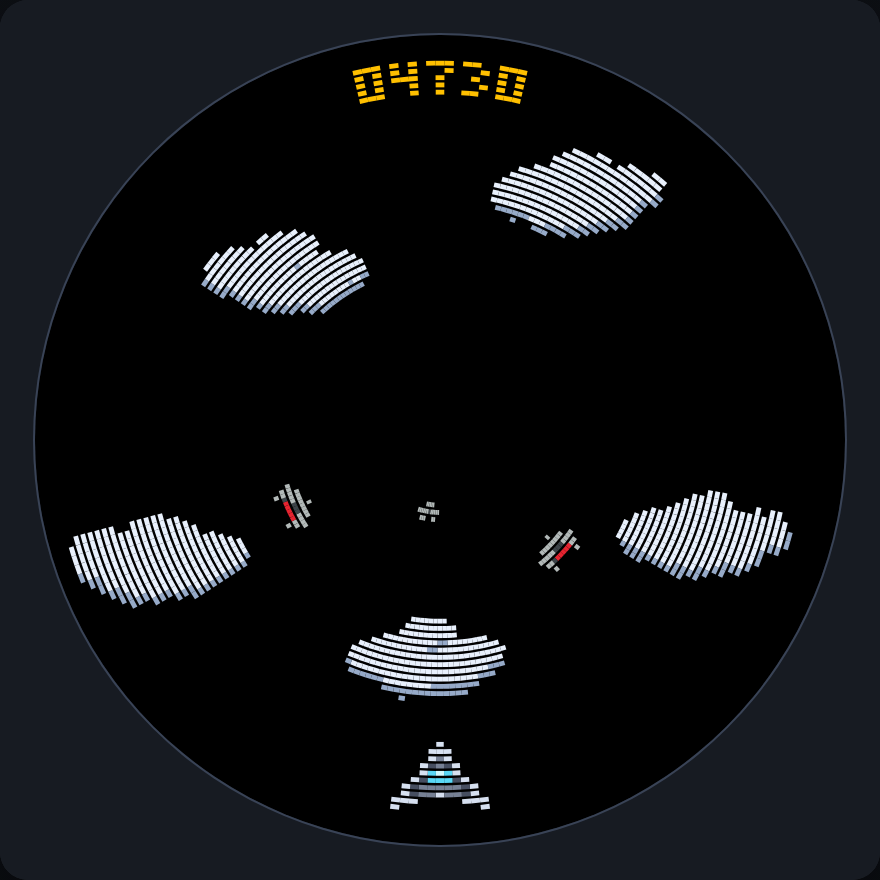
Three layers: world (ship and enemies), clouds (drawn over the world) and hud (the score, at the top, flipped so it reads upright; chapter 5 explains why).
A whole layer can be toggled or re-projected at runtime, without touching a single drawable:
self.hud.visible = False
self.radar.projection = vs2.HUD     # was TUNNEL
In the game
The ship from chapter 1 already flies all the way round: X wraps when it is
drawn, so a ship at x = 256 appears at 0 and one at x = -1 appears at 255.
What does not wrap is the number itself. ship.x keeps counting up or down, so
code that reads it back, such as a test of where the ship is or a comparison
with another sprite’s x, sees values like 300 or -12 for a ship
that is really at 44 or 244. (The ship starts at x = -9, for one: it is drawn
at 247.) Wrap it at the width of the display to keep it in the range 0 to 255:
def update(self):
    if joy1.held(LEFT):
        self.ship.x = (self.ship.x + 1) % vs2.display.width
    if joy1.held(RIGHT):
        self.ship.x = (self.ship.x - 1) % vs2.display.width
The left button adds to x because of the diagram at the top of this chapter: X
grows from the bottom toward the left (64 is on the left), so at the bottom of the
disc, where the ship lives, left is up. A ship at the top of the disc would be
the other way round.
The ship stays at y = 0, on the rim, for the whole game. Everything else will
come at it from deeper in the tunnel.
The file so far
Everything from this chapter in one file, as it stands after chapter 2. If yours misbehaves, compare it
with this one. It is docs/vs2/tutorial/steps/step2_display.py in the repository.
# Trench Run, chapter 2: a ship that flies all the way round.
import vs2
from vs2.controls import *


class Game(vs2.Scene):
    def build(self):
        self.world = self.layer("world", projection=vs2.TUNNEL)
        self.ship = self.world.sprite("ship.png", y=0)
        self.ship.x = -(self.ship.width // 2)     # centred on x = 0, the bottom of the disc

    def update(self):
        if joy1.held(LEFT):
            self.ship.x = (self.ship.x + 1) % vs2.display.width
        if joy1.held(RIGHT):
            self.ship.x = (self.ship.x - 1) % vs2.display.width


def main():
    return Game()
Next: sprites.