1. Your first game
Before creating these files, complete desktop setup
and run demos.tutorial_game. Keep the terminal open to see tracebacks.
A game is a folder. Create one under your own group name:
mkdir -p games/myname/mygame/code games/myname/mygame/images
Four things go in it:
games/myname/mygame/
├── code/mygame.py        your game; the module name matches the folder
├── images/               PNGs plus __images__.yaml
├── menu.png              the icon shown in the console menu, 64 x 30 pixels
└── meta.json             how the launcher lists it
menu.png is a 64 by 30 pixel picture, which the launcher shows on your game’s
tile. Make it in any pixel editor, or copy
games/demos/tutorial_game/menu.png to start with and change it. Keep it simple
and dark, like the display: transparent pixels draw nothing.
meta.json
This is what opts your game into VS2:
{
  "api": "vs2",
  "api_revision": 2,
  "title": "My Game",
  "order": 50
}
api and api_revision are both required. title and order control the
menu entry.
Images
Ventilastation cannot open PNGs directly. images/__images__.yaml describes how
they become sprite strips:
palettegroups:
  main:
    - strip: ship.png
      frames: 3
    - strip: enemy.png
      frames: 6
    - strip: trench.png
      frames: 8
    - strip: numerals.png
      frames: 12
      glyphs: "0123456789 *"
  text:
    - strip: steel8x8.png
      frames: 256
This is the complete file for the finished game, so you can write it once. This
chapter only uses ship.png; the other strips appear in the chapters that follow,
and the glyphs: line is explained in chapter 5. Every strip needs a frames:
entry, because the file does not say how many images a PNG holds.
A strip is a horizontal filmstrip of equally sized frames — a 3-frame strip is one PNG three times as wide as one frame:
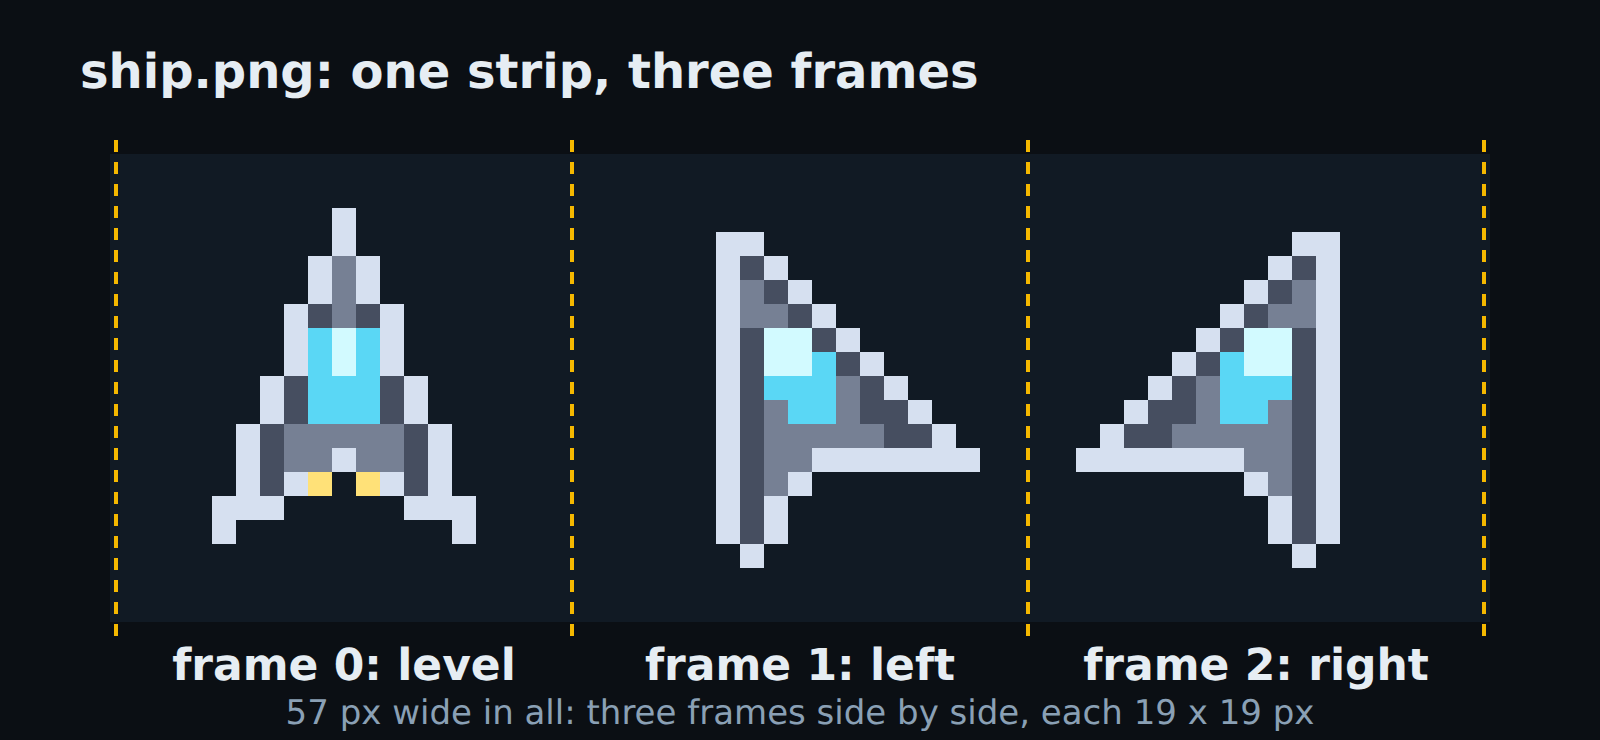
ship.png is 57 pixels wide and holds three frames, so its entry says frames: 3.
A palette group is a set of images that share 256 colours; put images that look alike in one group. The text font is in a group of its own, because its colours have little in common with the game art.
To follow along, copy all five PNGs Trench Run uses into your images/ folder
from games/demos/tutorial_game/images/: ship.png, enemy.png, trench.png,
numerals.png and steel8x8.png. This chapter only draws ship.png, but the
emulator builds every PNG the yaml lists, and one that is missing stops it from
starting, so copy them all now.
The emulator recompiles changed PNGs into a ROM every time it starts, so you just edit and rerun.
The code
code/mygame.py needs a scene — a Scene subclass — and
a main() that returns an instance:
import vs2
from vs2.controls import *


class Game(vs2.Scene):
    def build(self):
        self.world = self.layer("world", projection=vs2.TUNNEL)
        self.ship = self.world.sprite("ship.png", y=0)
        self.ship.x = -(self.ship.width // 2)

    def update(self):
        if joy1.held(LEFT):
            self.ship.x += 1
        if joy1.held(RIGHT):
            self.ship.x -= 1


def main():
    return Game()
That is a complete program, though not much of a game yet: it puts a ship on the disc and lets you steer it. Run it by naming the game, which skips the menu:
./vs-emu.sh --game myname.mygame # vs-emu.bat --game myname.mygame on Windows
The name is the group and the folder, joined with a dot. When the game exits (the
back button, or a crash) the emulator returns to the menu as usual, and the game is
also there under Más aplicaciones, then myname, then My Game; run
./vs-emu.sh with no arguments to start from the menu. The ship sits at the
bottom of the disc, because x = 0 is the bottom and y = 0 is the rim:
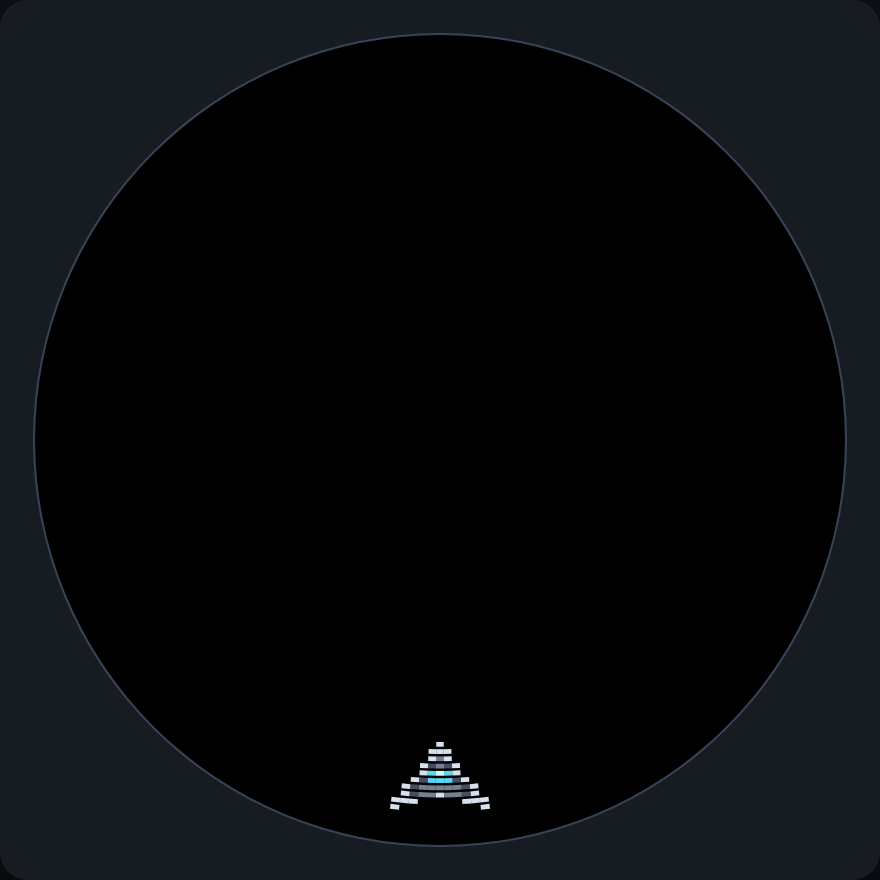
The ship at x = 0, y = 0: the bottom of the disc, on the rim.
A sprite’s x is where its image starts, not its middle, so the second line of
build() backs up by half the ship’s width, 9 columns, to centre the ship on the
bottom.
Hold the left button and x counts up: at the bottom of the disc that is the
direction of the player’s left, as the diagram in the next chapter shows. The
ship slides toward the left side of the disc:
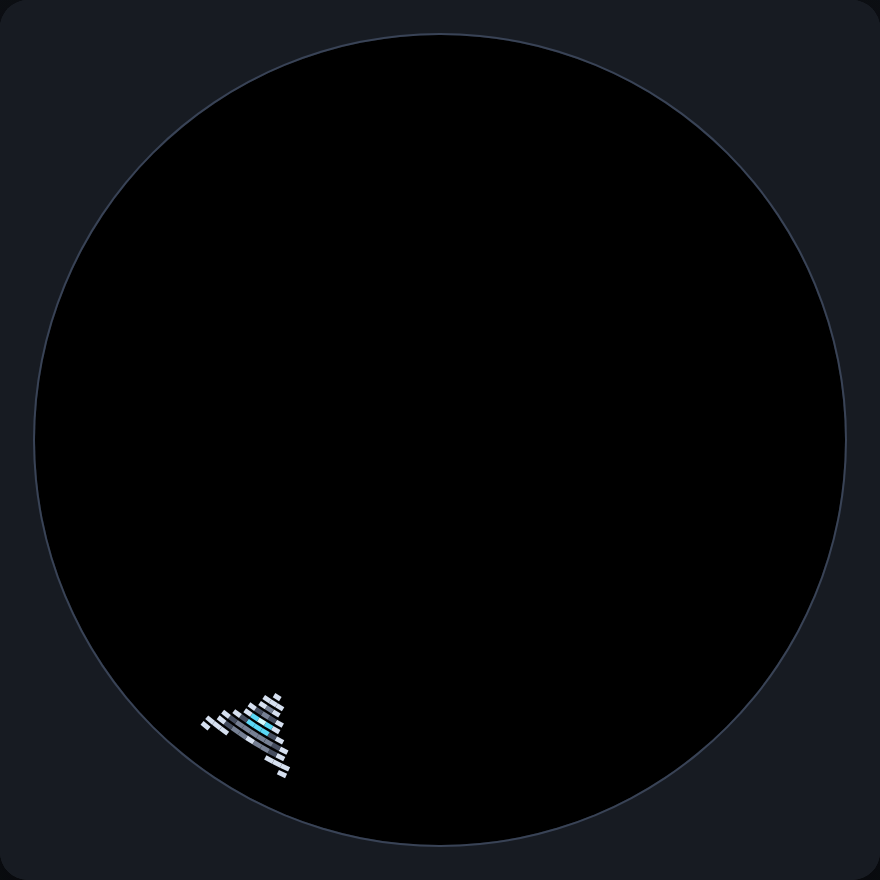
After holding left for a moment.
Controls
The code asks a controller for its buttons: joy1.held(LEFT) is true while the
left button is down. On the console players use the game controllers. In the
desktop emulator the keyboard stands in for them:
Keys |
Controller 1 |
|---|---|
Arrow keys, or |
|
|
|
|
|
A USB gamepad works too. joy2 is the second controller, on H J K L,
Z X C V, Home and End. Chapter 6 explains how held() differs from
just_pressed(); until then every button in the tutorial is held().
When something goes wrong
Errors and anything your game print()s appear in the terminal where you ran
vs-emu.sh. A crash is marked Rotor traceback, with the file and line that
raised it. Watch that window while you edit, since mistakes like the one in the
next section show up there and not on the disc.
What those two methods mean
Build runs once each time the scene is entered and creates
everything the scene will ever draw. update() runs about 33
times a second (once per tick) and moves what already exists.
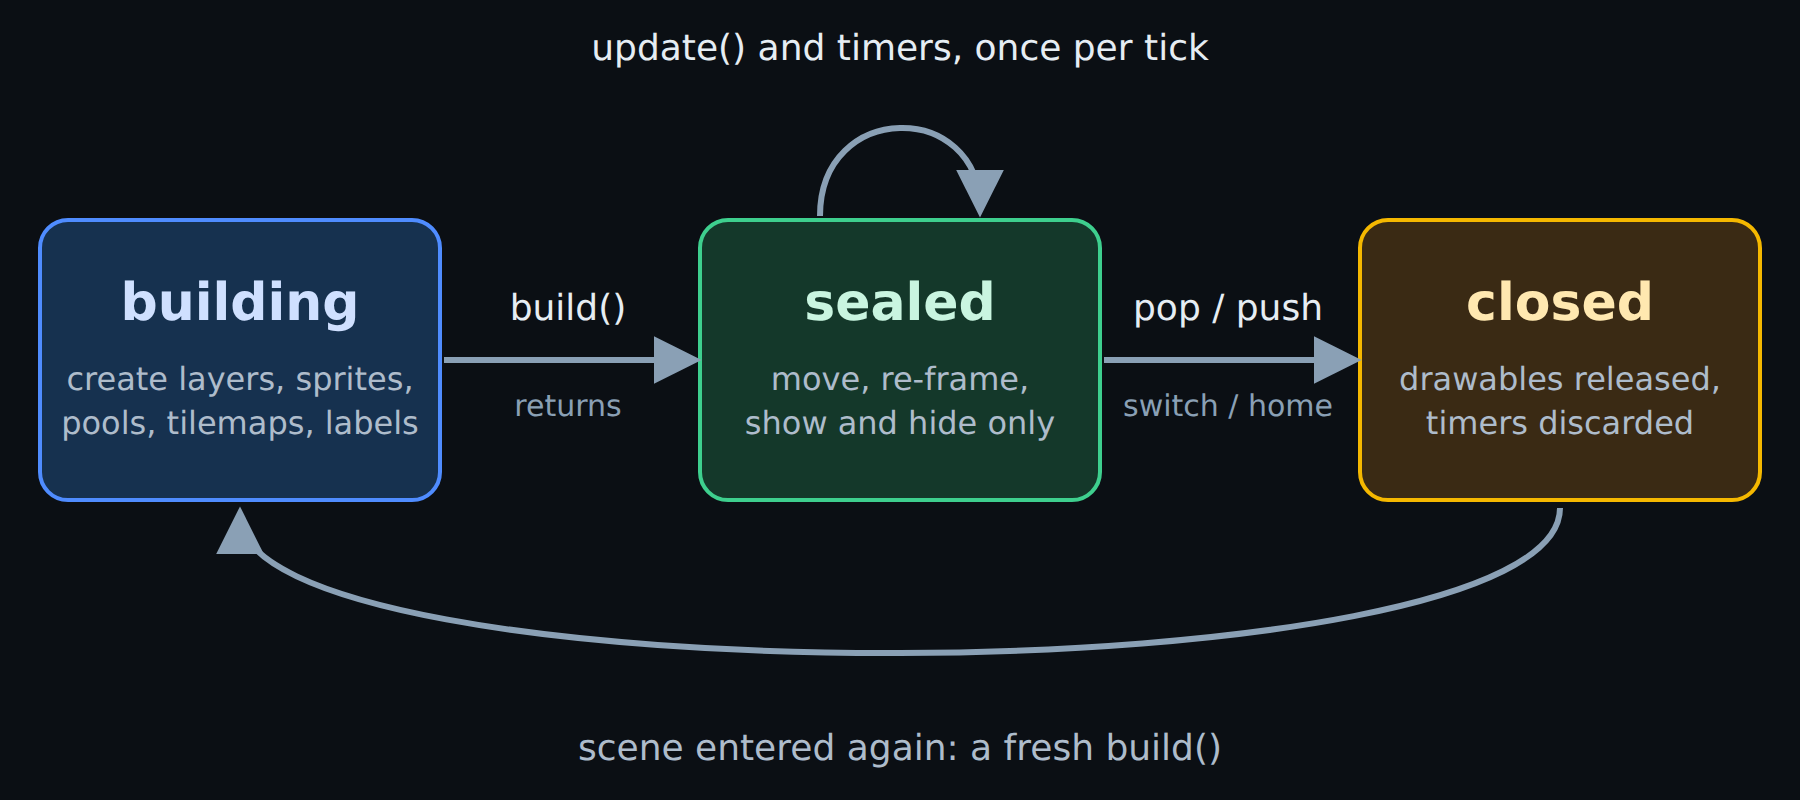
A scene’s life. Only the building state may create layers and drawables.
The split is enforced. When build() returns, the scene is sealed: try
to create a sprite from update() and you get
SceneSealedError: sprite() is only allowed while Game.build() runs
So running out of sprites becomes an error the first time you enter the scene, not a surprise in the middle of play.
Leaving the game
Players leave with the back button (Y or BACK), or after 30 seconds without
input. Both return to the launcher on their own, so your game needs no exit
code.
The file so far
Everything from this chapter in one file, the game as it stands after chapter 1. If yours misbehaves, compare it
with this one. It is docs/vs2/tutorial/steps/step1_first_game.py in the repository.
# Trench Run, chapter 1: a ship you can steer.
import vs2
from vs2.controls import *


class Game(vs2.Scene):
    def build(self):
        self.world = self.layer("world", projection=vs2.TUNNEL)
        self.ship = self.world.sprite("ship.png", y=0)
        self.ship.x = -(self.ship.width // 2)     # centred on x = 0, the bottom of the disc

    def update(self):
        if joy1.held(LEFT):
            self.ship.x += 1        # at the bottom of the disc, x counts up toward the left
        if joy1.held(RIGHT):
            self.ship.x -= 1


def main():
    return Game()
This ship is where Trench Run starts. Over the next chapters it gets a tunnel to
fly down, enemies to dodge, a score and a game-over screen. Next: the circular display,
and why x behaves differently from y.